Add domains and SSL/TLS certificates
Learn how to add domains and SSL/TLS certificates, and enable automatic certificate renewal with Let’s Encrypt.
What you can configure
On the Domains & SSL tab, you can:
-
add domains whose traffic the protection system should process;
-
add your own SSL/TLS certificate;
-
issue a certificate with Let’s Encrypt if you do not have your own certificate;
-
configure automatic certificate renewal with Let’s Encrypt;
-
monitor certificate status and expiration dates.

|
This is a required setting if you use the Proxy integration option. With this option, all traffic passes through our infrastructure, so you need to add both domains and SSL/TLS certificates for protection to work correctly. If you use the Hybrid integration option, add only domains, without certificates. For other integration options, you do not need to add domains or certificates. |
Add domains
Specify the domains whose traffic the protection system should process. The system does not accept requests to other domains.
How you add domains depends on which addresses your resource uses. Select your option below to see detailed instructions.
-
One domain
-
Multiple domains
-
Many subdomains of one domain
If your resource uses only one domain, for example example.com, it is enough to specify it as the resource name.
-
In the resource settings, open the
Base settingstab. -
In the
Resource namefield, specify the domain without www.
The system automatically adds this domain to protection. It accepts traffic addressed to the domain, filters it according to the configured policies, and forwards legitimate requests to your origin servers.
If your resource is available at several separate addresses, for example example.com, api.example.com, and example.org, add them to the protected domains list.
-
Open the
Domains & SSLtab. -
Click
+ Add domain.
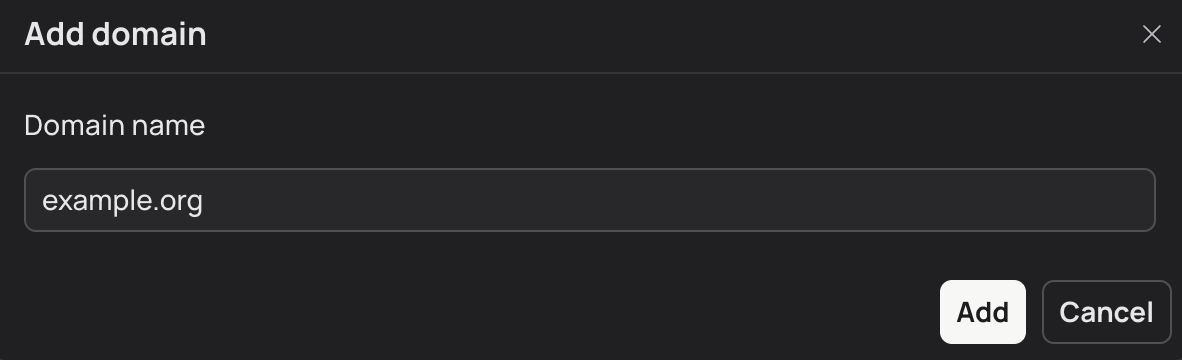
-
In the window that opens, specify the domain name without www.
If a domain is already specified as the resource name, you do not need to add it again. It is already protected.
-
Click
Add. -
Repeat these steps for the other domains.
|
For each of your domains, the system automatically adds the corresponding For example, if the resource name is 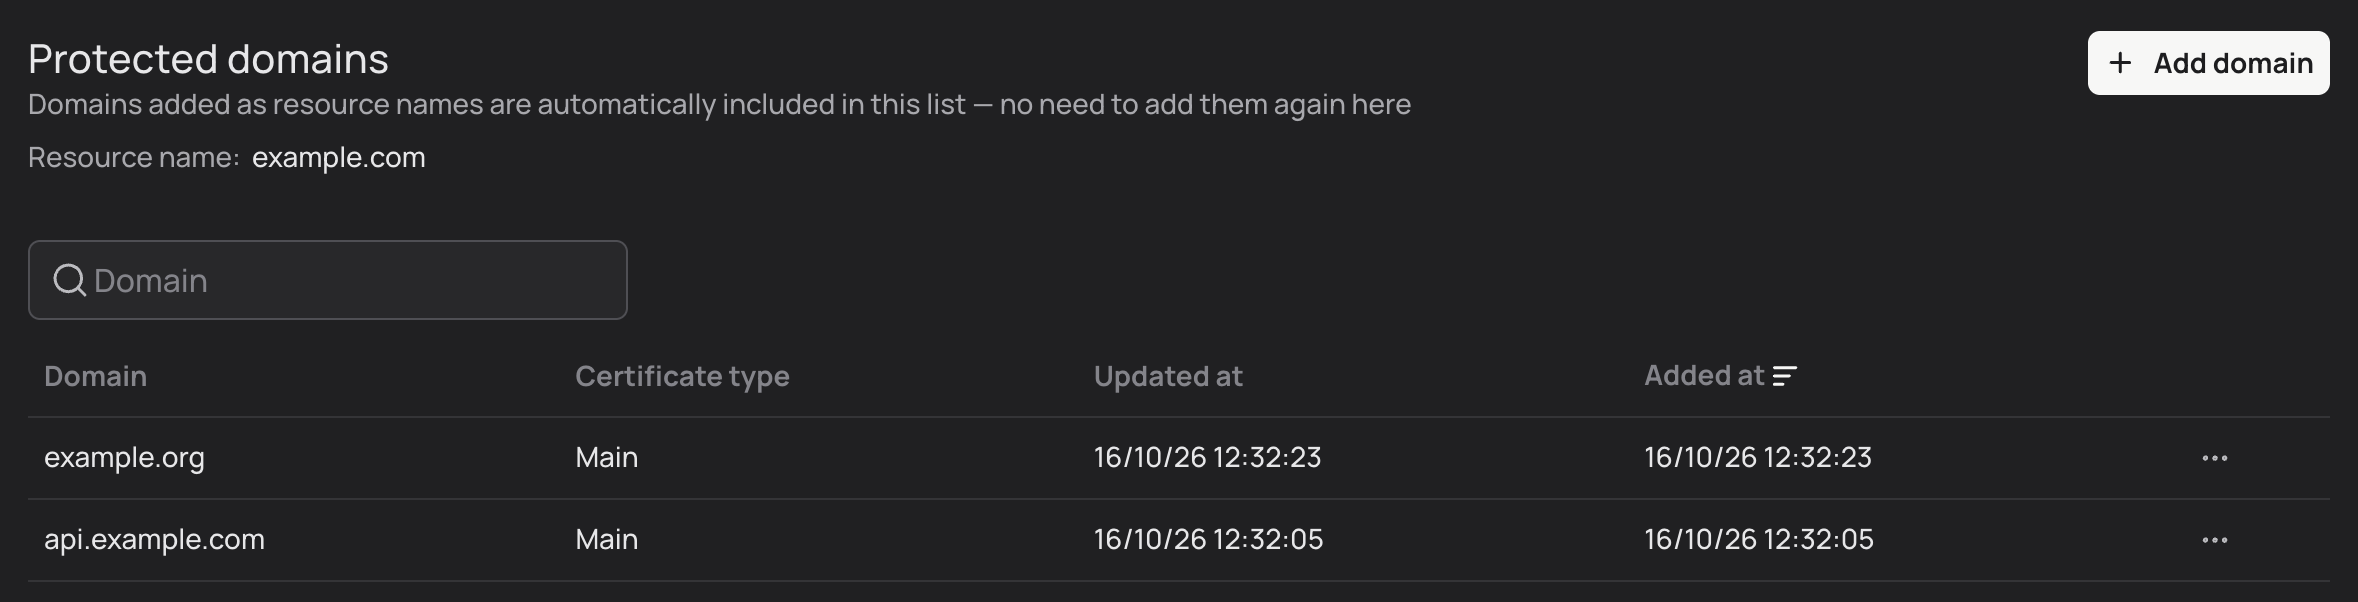
The resource actually has six domains. The protection system can process requests to all six:
The system also prevents duplicates. If the resource name is |
Suppose you want to protect the following domains:
-
api.example.com; -
shop.example.com; -
support.example.com; -
account.example.com; -
other subdomains of
example.com.
You do not have to add each subdomain separately. Instead, use the wildcard domain *.example.com. With one entry, it covers all current and future subdomains of the same level.
-
Open the
Domains & SSLtab. -
Click
+ Add domain.
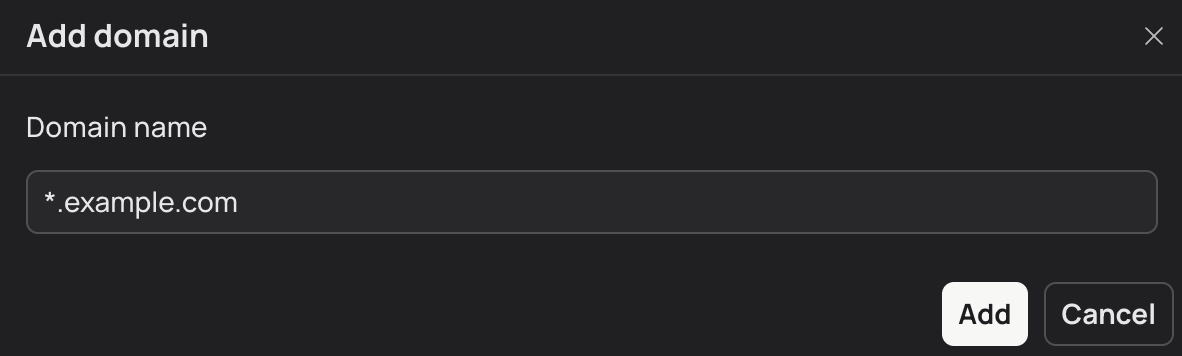
-
In the window that opens, specify the wildcard domain.
-
Click
Add.
The system protects subdomains of the level marked with *. For example, *.example.com covers api.example.com, shop.example.com, and support.example.com, but not test.api.example.com.
|
The wildcard domain |
Add SSL/TLS certificates
The protection system needs an SSL/TLS certificate to decrypt HTTPS traffic and filter it.
If you do not have your own certificate, you can issue one with Let’s Encrypt. The system obtains the certificate, installs it, and then renews it automatically. For details, see Enable certificate issuance and automatic renewal with Let’s Encrypt.
If you have a certificate, you can add it as:
-
a main certificate, which is used by default for all resource domains that do not have their own certificate;
-
a domain certificate, which is used only for a specific domain instead of the main certificate.
Example: how to add certificates correctly
Suppose you added the following domains to your resource:
-
example.com; -
api.example.com; -
sample.com.
You also have two certificates:
-
example.crt, a wildcard certificate forexample.comand*.example.com; -
sample.crt, a certificate forsample.com.
Configure them as follows:
-
Add
example.crtas the main certificate. -
Add
sample.crtas a domain certificate forsample.com.
The system uses:
-
example.crtforexample.comandapi.example.com; -
sample.crtforsample.com.
-
Main certificate
-
Domain certificate
Add a certificate as the main certificate if you want to use it by default for all resource domains. If a domain has its own certificate, the system uses the domain certificate for it instead of the main one.
-
On the
Domains & SSLtab, click+ Upload certificate.

-
In the window that opens, paste the certificate and the private RSA key.
If the certificate was issued by a certificate authority (CA), paste your domain certificate in the
Certificate chainfield first, followed by the intermediate certificates issued with it.Example of a certificate chain-----BEGIN CERTIFICATE----- MIIFazCCA1OgAwIBAgISA5X7nH9fN0Qk3V7F2JvN8xYz [...] lM8k2nH4x7pQ3vY6zW1aB9cD0eF2gH5jK8mN4pR6sT== -----END CERTIFICATE----- -----BEGIN CERTIFICATE----- MIIEkjCCA3qgAwIBAgIQCv1eRG9c89YADp5Gwibf9jAN [...] qN7x2V4bF8mK3pL6sR9tW1yZ5cD0eH7jM2nP4qS8uA== -----END CERTIFICATE-----The first block is your domain certificate, and the second is an intermediate certificate. Together, they form a chain that shows which CA issued the certificate.
If the certificate is self-signed, that is, issued without an external CA, paste only the domain certificate.
Example of a self-signed certificate-----BEGIN CERTIFICATE----- MIIFazCCA1OgAwIBAgISA5X7nH9fN0Qk3V7F2JvN8xYz [...] lM8k2nH4x7pQ3vY6zW1aB9cD0eF2gH5jK8mN4pR6sT== -----END CERTIFICATE-----The certificate and private key must match each other and be in PEM format.
What is PEM format?PEM is a text format for storing certificates and cryptographic keys. The data is enclosed between the
-----BEGIN …-----and-----END …-----lines.Example of a certificate:
-----BEGIN CERTIFICATE----- MIIFazCCA1OgAwIBAgISA5X7nH9fN0Qk3V7F2JvN8xYz [...] lM8k2nH4x7pQ3vY6zW1aB9cD0eF2gH5jK8mN4pR6sT== -----END CERTIFICATE-----Example of a private RSA key:
-----BEGIN RSA PRIVATE KEY----- MIIEowIBAAKCAQEAxY9F2K8mN3vQ6sT1wZ4cD7eH0jL2pR5u [...] z3P668YfhUbKdRF6S42Cg6zn -----END RSA PRIVATE KEY----- -
Click
Upload.
Add a separate certificate if a specific domain needs a certificate other than the main one.
-
On the
Domains & SSLtab, find the required domain in the protected domains list. -
Click the ellipsis (
…) next to it and selectUpload domain certificate.
-
In the window that opens, paste the certificate and the private RSA key.
If the certificate was issued by a certificate authority (CA), paste your domain certificate in the
Certificate chainfield first, followed by the intermediate certificates issued with it.Example of a certificate chain-----BEGIN CERTIFICATE----- MIIFazCCA1OgAwIBAgISA5X7nH9fN0Qk3V7F2JvN8xYz [...] lM8k2nH4x7pQ3vY6zW1aB9cD0eF2gH5jK8mN4pR6sT== -----END CERTIFICATE----- -----BEGIN CERTIFICATE----- MIIEkjCCA3qgAwIBAgIQCv1eRG9c89YADp5Gwibf9jAN [...] qN7x2V4bF8mK3pL6sR9tW1yZ5cD0eH7jM2nP4qS8uA== -----END CERTIFICATE-----The first block is your domain certificate, and the second is an intermediate certificate. Together, they form a chain that shows which CA issued the certificate.
If the certificate is self-signed, that is, issued without an external CA, paste only the domain certificate.
Example of a self-signed certificate-----BEGIN CERTIFICATE----- MIIFazCCA1OgAwIBAgISA5X7nH9fN0Qk3V7F2JvN8xYz [...] lM8k2nH4x7pQ3vY6zW1aB9cD0eF2gH5jK8mN4pR6sT== -----END CERTIFICATE-----The certificate and private key must match each other and be in PEM format.
What is PEM format?PEM is a text format for storing certificates and cryptographic keys. The data is enclosed between the
-----BEGIN …-----and-----END …-----lines.Example of a certificate:
-----BEGIN CERTIFICATE-----
MIIFazCCA1OgAwIBAgISA5X7nH9fN0Qk3V7F2JvN8xYz
[...]
lM8k2nH4x7pQ3vY6zW1aB9cD0eF2gH5jK8mN4pR6sT==
-----END CERTIFICATE-----
Example of a private RSA key:
-----BEGIN RSA PRIVATE KEY----- MIIEowIBAAKCAQEAxY9F2K8mN3vQ6sT1wZ4cD7eH0jL2pR5u [...] z3P668YfhUbKdRF6S42Cg6zn -----END RSA PRIVATE KEY----- -
Click
Upload.
Enable certificate issuance and automatic renewal with Let’s Encrypt
You can use Let’s Encrypt both to issue a certificate and to automatically renew an installed one.
Automatic renewal protects your resource if your current SSL/TLS certificate expires before you add a new one. This is an optional setting, but we recommend enabling it.
How it works
-
You enable automatic renewal.
-
If there is no certificate, the system immediately starts issuing a Let’s Encrypt certificate.
-
If there is a certificate, the system continues to use it and monitors its expiration date.
-
Twenty-seven days before the certificate expires, the system starts issuing a Let’s Encrypt certificate.
-
Once the certificate is issued, the system automatically replaces the current certificate with the Let’s Encrypt certificate. From this point on, TLS connections use the Let’s Encrypt certificate.
|
If you later upload your own new certificate, the system replaces the Let’s Encrypt certificate with it. TLS connections then use your certificate again. |
How to enable
|
Before enabling the option, make sure that your domain has the settings required to pass the Let’s Encrypt challenge. The settings differ for a regular domain, such as
|
To enable automatic renewal for the domain specified as the resource name, turn on Auto-renew with Let’s Encrypt.

To enable automatic renewal for a domain from the protected domains list, click the ellipsis (…) and select Enable auto-renewal.

FAQ
What is a Let’s Encrypt certificate, and is it safe?
What is Let’s Encrypt? It is a free, open certificate authority (CA). It automatically issues SSL/TLS certificates through ACME, an open protocol that can:
-
Verify that the person requesting a certificate actually controls the domain.
-
Issue a certificate automatically, without manual actions.
What is a Let’s Encrypt certificate? It is an SSL/TLS certificate issued by Let’s Encrypt.
How safe is it? A Let’s Encrypt certificate is as secure as any other certificate. It uses modern algorithms, supports all standard encryption levels, and is renewed regularly. Its only special feature is a 90-day validity period, so it must be renewed more often. When automatic renewal is enabled, the system does this automatically.
How is a Let’s Encrypt certificate issued?
Before issuing a certificate, Let’s Encrypt verifies that it is requested by someone who actually controls the domain, not by an attacker. For this, it uses a special check called a challenge. The type of check depends on the domain type.
For a regular domain, such as example.com or api.example.com, Let’s Encrypt uses an HTTP-01 challenge:
-
Let’s Encrypt asks to place a special verification value at
http://your-domain/.well-known/acme-challenge/<token>. -
Our protection system automatically prepares the required response at this address.
-
Let’s Encrypt sends a request to this address and checks the response.
-
If the response is correct, Let’s Encrypt confirms domain control and issues the certificate. The protection system receives it and starts using it.
For a wildcard domain, such as *.example.com, Let’s Encrypt uses a DNS-01 challenge:
-
Let’s Encrypt asks to place a special verification value in the domain’s DNS zone.
-
The value is added to a special TXT record:
_acme-challenge.your-domain. -
Let’s Encrypt queries this DNS record and checks its value.
-
If the value is correct, Let’s Encrypt confirms domain control and issues the certificate. The protection system receives it and starts using it.
The settings required to pass an HTTP-01 or DNS-01 challenge are described in How to enable.
What happens if my certificate is about to expire and automatic renewal is not enabled?
When users try to access your resource over HTTPS, their browser displays a warning that the connection is not secure.
Manage domains and certificates
On the Domains & SSL tab, you can check certificate status and change domain settings.
For the main certificate, the system shows the expiration date and status:
-
None—no certificate has been added. -
Issuing—the system is currently trying to issue a Let’s Encrypt certificate. -
Active—the certificate is valid. -
Expiring—the certificate expires in 25 days or less. -
Expired—the certificate has expired. When users try to access your resource over HTTPS, their browser displays a warning that the connection is not secure.
|
To replace the main certificate, upload a new one by following the same instructions as when adding it. The new certificate replaces the current one. |

For domains from the protected domains list, you can see:
-
which certificate is used: the main certificate or a domain certificate;
-
whether automatic renewal is enabled;
-
when the certificate expires.

You can manage protected domains and their certificates directly from the list:
-
Replace a certificate: click the ellipsis (
…) next to the required domain and selectUpload domain certificate. In the window that opens, upload the new certificate and private key. The new certificate replaces the current one. -
Use the main certificate: click the ellipsis (
…) and selectUse main certificate. The domain certificate is no longer used, and the system switches to the main certificate of the resource. -
Enable or disable automatic renewal: click the ellipsis (
…) and selectEnable auto-renewalorDisable auto-renewal. If you disable automatic renewal, the current certificate continues to work until it expires, but the system does not issue a new Let’s Encrypt certificate. -
Delete a domain: click the ellipsis (
…), selectDelete, and confirm the deletion. The system stops processing traffic addressed to this domain.

Certificate expiration notifications
Enable notifications to learn in advance when your SSL/TLS certificates are about to expire. The system sends the first notification 25 days before expiration and the second one 10 days before expiration.
|
Notifications are sent whether or not automatic renewal with Let’s Encrypt is enabled. If you have multiple certificates, you receive notifications for each of them. |
-
Open the account settings.
-
Go to the
Notification subscriptiontab. -
In the subscription, specify the recipients and the delivery channel: email, Telegram, or webhook.
-
Select the
Certificate expirationevent.
For detailed instructions, see Notification subscriptions.